
Watch a veteran technician work and you’ll notice something odd: they barely look at their tool cart. Hand out, drawer open, right tool, drawer closed — in seconds. That speed isn’t talent; it’s layout. A well-organized mechanic tool cart can cut minutes off every job, while a messy one quietly taxes every single task. In this guide we break down how professionals organize their carts zone by zone — the same principles we build into our tool cart designs at our factory, and ones you can apply to your cart this afternoon.

Why Organization Beats Hardware

Two shops can own the same cart and get completely different results from it. Organization decides:
1. Job speed. Mechanics spend a surprising share of each job just fetching — walking, searching, opening the wrong drawer. Good layout removes most of it.
2. Tool loss. Loose drawers lose tools; defined positions make a missing wrench obvious in one glance.
3. Cart lifespan. Heavy tools stored in the wrong drawers overload slides and warp bottoms — organization is also maintenance.
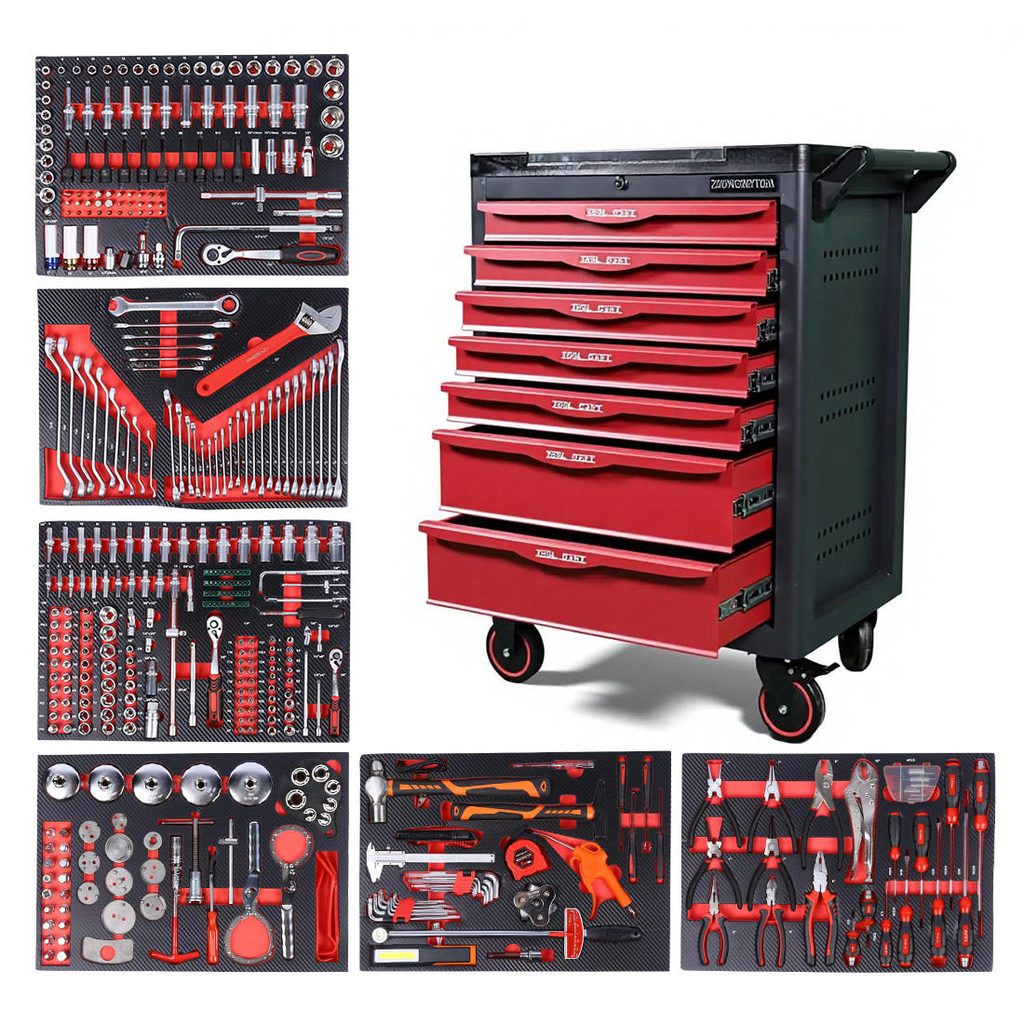
The cart itself still matters, of course — drawer count, depth mix and slide quality set the ceiling. If yours is fundamentally too small or under-rated, fix that first (see 7 vs 12 drawer trade-offs and our heavy duty cart guide); then organize it like this.
The Professional Zone Layout, Step by Step
Think of the cart as vertical real estate: the closer a drawer is to your chest, the faster it should give up its tools.
- Top deck — the work surface, not a shelf. Keep only what serves the current job: a magnetic tray for bolts, a parts dish, shop towels and your current project. Everything else lives in drawers. If your top is permanently covered, that’s a storage problem, not an organization one.
- Top drawers (chest height) — the money tools. Ratchets, the most-used socket sizes, combination wrenches and pliers. These should be reachable without bending or squatting, because you touch them dozens of times a day.
- Middle drawers — task groups. Screwdrivers, hex/Torx sets, trim tools, test lights, picks. Group by task rather than strictly by type — a “brake job” drawer or “electrical” drawer beats hunting across five theme drawers.
- Lower drawers — the heavy, rarely-touched gear. Breaker bars, jacks, torque wrench cases, big hammers. Heavy items low keeps the cart stable and spares the slides — the same load logic from our heavy duty guide.
- Bottom or side — consumables and spares. Fuses, hose clamps, zip ties and common nuts and bolts in small bins. Stocked, labeled, out of the way.
The one-line rule: frequency decides height, weight decides depth.
4 Habits That Keep It Professional
1. A place for every tool — ideally in foam. Cut foam inserts (kaizen foam) so every tool leaves a shadow. Missing tools show up instantly, and drawers stop becoming junk drawers. This is standard practice in dealer workshops for a reason.
2. Label every drawer edge. A label maker costs little and pays daily. New staff, tired afternoons, rushed jobs — labels remove all the thinking.
3. The reset rule. End of job, tools go home. End of week, five minutes of drawer checks. Professionals don’t “clean up sometime” — they reset by default.
4. One in, one out. New tool enters the cart, something leaves. Without this rule, even the best system silts up within months.
Common Organizing Mistakes
1. Organizing by type instead of by frequency. A beautiful drawer of “all pliers” you use twice a month doesn’t deserve chest height. Frequency first, type second.
2. Packing drawers full. Full drawers hide what’s inside and jam. Leave 20–30% free space — the same headroom rule we recommend when sizing a whole cart.
3. No labels and no foam. Memory-based systems work until you’re tired, in a hurry, or someone else borrows the cart. Systems beat memory.
4. Ignoring the top deck. A buried worktop means the cart has no work surface at all — treat the deck as zero-tolerance clutter zone.
Ready to Upgrade Your Tool Cart Setup?
We are a professional mechanic tool cart and tool cabinet manufacturer based in China, supporting OEM/ODM, wholesale and full customization — drawer layouts, foam inserts, dividers, colors and logos. Contact us for a free quote and product catalog, or browse our tool carts.
Frequently Asked Questions
Q1: How do I decide which tools go in which drawer?
Track yourself for two days: the tools you reach for most often go at chest height, task-related groups share a drawer, heavy and rarely-used items go low. Re-check the layout after a month — real usage rarely matches your first guess.
Q2: Are foam drawer inserts worth it?
For professionals, yes — they lock every tool into a visible position, make missing tools obvious, and stop drawers from turning into mix piles. For mixed-use carts, half-height foam in the top two drawers is a good compromise.
Q3: How often should I re-organize my tool cart?
Reset daily (tools back in place), check weekly (five minutes), and do a full re-layout every quarter or whenever your job type changes. If you’re re-organizing more often than that, the layout itself is wrong.
Q4: Can I order tool carts with custom drawer layouts, dividers or foam?
Yes. As a factory-direct manufacturer we customize drawer configurations, dividers, foam inserts, steel thickness, colors and logos under OEM/ODM. Standard MOQ is 50 units, and first-time buyers can start with a 1-unit sample order.